Category: Blog

  • spring-cloud-stream-binder-sqs

    Spring Cloud Stream Binder for AWS SQS

    spring-cloud-stream-binder-sqs lets you use Spring Cloud Stream with
    the AWS Simple Queue Service (SQS).

    Installation

    <dependencies>
        <dependency>
            <groupId>de.idealo.spring</groupId>
            <artifactId>spring-cloud-stream-binder-sqs</artifactId>
            <version>3.0.0</version>
        </dependency>
    </dependencies>

    Compatabilty

    spring-cloud-stream-binder-sqs spring-boot spring-cloud-aws spring-cloud aws sdk java compiler/runtime
    1.9.0 2.7.x 2.4.x 2021.0.5 1.x 8
    3.0.0 3.1.x 3.0.x 2022.0.3 2.x 17

    Changes in 3.0.0:

    • removed consumer configuration for messageDeletionPolicy: the default behaviour is now that Messages will be
      acknowledged when message processing is successful.
    • renamed consumer configuration for maxNumberOfMessages to maxMessagesPerPoll to align with the naming in
      spring-cloud-aws-sqs. The old property is deprecated but still supported for now.
    • renamed consumer configuration for waitTimeout to pollTimeout to align with the naming in
      spring-cloud-aws-sqs. The old property is deprecated but still supported for now.
    • renamed consumer configuration for queueStopTimeout to listenerShutdownTimeout to align with the naming in
      spring-cloud-aws-sqs. The old property is deprecated but still supported for now.

    Usage

    With the library in your dependencies you can configure your Spring Cloud Stream bindings as usual. The type name for
    this binder is sqs. The destination needs to match the queue name, the specific ARN will be looked up from the
    available queue in the account.

    You may also provide additional configuration options:

    • Consumers
      • maxMessagesPerPoll – Maximum number of messages to retrieve with one poll to SQS. Must be a number between 1
        and 10.
      • visibilityTimeout – The duration in seconds that polled messages are hidden from subsequent poll requests
        after having been retrieved.
      • pollTimeout – The duration in seconds that the system will wait for new messages to arrive when polling. Uses
        the Amazon SQS long polling feature. The value should be between 1 and 20.
      • listenerShutdownTimeout – The number of milliseconds that the queue worker is given to gracefully finish its
        work on
        shutdown before interrupting the current thread. Default value is 10 seconds.
      • snsFanout – Whether the incoming message has the SNS format and should be deserialized automatically. Defaults
        to true.

    Example Configuration:

    spring:
      cloud:
        stream:
          sqs:
            bindings:
              someFunction-in-0:
                consumer:
                  snsFanout: false
          bindings:
            someFunction-in-0:
              destination: input-queue-name
            someFunction-out-0:
              destination: output-queue-name

    You may also provide your own beans of SqsAsyncClient to override those that are created
    by spring-cloud-aws-autoconfigure.

    FIFO queues

    To use FIFO SQS queues
    you will need to provide a deduplication id and a group id.
    With this binder you may set these using the message headers SqsHeaders.GROUP_ID and SqsHeaders.DEDUPLICATION_ID.
    The example below shows how you could use a FIFO queue in real life.

    Example Configuration:

    spring:
      cloud:
        stream:
          bindings:
            someFunction-in-0:
              destination: input-queue-name
            someFunction-out-0:
              destination: output-queue-name.fifo

    class Application {
        @Bean
        public Message<String> someFunction(String input) {
            return MessageBuilder.withPayload(input)
                    .setHeader(SqsHeaders.GROUP_ID, "my-application")
                    .setHeader(SqsHeaders.DEDUPLICATION_ID, UUID.randomUUID())
                    .build();
        }
    }

    Concurrency

    Consumers in the SQS binder support the Spring Cloud Stream concurrency property.
    By specifying a value you will launch concurrency threads continuously polling for maxNumberOfMessages each.
    The threads will process all messages asynchronously, but each thread will wait for its current batch of messages to all
    complete processing before retrieving new ones.
    If your message processing is highly variable from message to message it is recommended to set a lower value
    for maxNumberOfMessages and a higher value for concurrency.
    Note that this will increase the amount of API calls done against SQS.

    Example Configuration:

    spring:
      cloud:
        stream:
          sqs:
            bindings:
              someFunction-in-0:
                consumer:
                  maxMessagesPerPoll: 5
          bindings:
            someFunction-in-0:
              destination: input-queue-name
              consumer:
                concurrency: 10

    Visit original content creator repository
    https://github.com/idealo/spring-cloud-stream-binder-sqs

  • hydra_login2f

    hydra_login2f

    hydra_login2f is a secure login provider for ORY Hydra OAuth2
    Server
    . hydra_login2f implements
    two-factor authentication via email.

    Installation

    hydra_login2f can be deployed directly from a docker image. You can
    find a working example in the example/ directory.

    Configuration

    hydra_login2f‘s behavior can be tuned with environment
    variables. Here are the most important settings with their default
    values:

    # The port on which `hydra_login2f` will run.
    PORT=8000
    
    # The path to the login page (ORY Hydra's `OAUTH2_LOGIN_URL`):
    LOGIN_PATH='/login'
    
    # The path to the dummy consent page (ORY Hydra's `OAUTH2_CONSENT_URL`).
    # `hydra_login2f` implements a dummy consent page, which accepts all
    # consent requests unconditionally, without showing any UI to the user.
    # This is sometimes useful, especially during testing.
    CONSENT_PATH='/consent'
    
    # The prefix added the user ID to form the Oauth2 subject field. For
    # example, if SUBJECT_PREFIX='user:', the OAuth2 subject for the user
    # with ID=1234 would be 'user:1234'.
    SUBJECT_PREFIX=''
    
    # Set this to a random, long string. This secret is used only to sign
    # the session cookies which guide the users' experience, and therefore it
    # IS NOT of critical importance to keep this secret safe.
    SECRET_KEY='dummy-secret'
    
    # Set this to the name of your site, as it is known to your users.
    SITE_TITLE='My site name'
    
    # Set this to an URL that tells more about your site.
    ABOUT_URL='https://github.com/epandurski/hydra_login2f'
    
    # Optional URL for a custom CSS style-sheet:
    STYLE_URL=''
    
    # Whether to issue recovery codes to your users for additional security
    # ('True' or 'False'). It is probably a good idea to use recovery codes
    # if the account to your service might be more important to your users
    # than their email account.
    USE_RECOVERY_CODE=True
    
    # Whether to hide the "remember me" checkbox from users. If this is set to
    # `True`, the "remember me" checkbox will not be shown. This might be useful
    # when saving the login credentials poses a risk.
    HIDE_REMEMBER_ME_CHECKBOX=False
    
    # Set this to the URL for ORY Hydra's admin API.
    HYDRA_ADMIN_URL='http://hydra:4445'
    
    # Set this to the URL for your Redis server instance. It is highly
    # recommended that your Redis instance is backed by disk storage. If not so,
    # your users might be inconvenienced when your Redis instace is restarted.
    REDIS_URL='redis://localhost:6379/0'
    
    # Set this to the URL for your SQL database server instance. PostgreSQL
    # and MySQL are supported out of the box. Example URLs:
    # - postgresql://user:pass@servername/dbname
    # - mysql+mysqlconnector://user:pass@servername/dbname
    SQLALCHEMY_DATABASE_URI=''
    
    # The size of the database connection pool. If not set, defaults to the
    # engine’s default (usually 5).
    SQLALCHEMY_POOL_SIZE=None
    
    # Controls the number of connections that can be created after the pool
    # reached its maximum size (`SQLALCHEMY_POOL_SIZE`). When those additional
    # connections are returned to the pool, they are disconnected and discarded.
    SQLALCHEMY_MAX_OVERFLOW=None
    
    # Specifies the connection timeout in seconds for the pool.
    SQLALCHEMY_POOL_TIMEOUT=None
    
    # The number of seconds after which a connection is automatically recycled.
    # This is required for MySQL, which removes connections after 8 hours idle
    # by default. It will be automatically set to 2 hours if MySQL is used.
    # Some backends may use a different default timeout value (MariaDB, for
    # example).
    SQLALCHEMY_POOL_RECYCLE=None
    
    # SMTP server connection parameters. You should set `MAIL_DEFAULT_SENDER`
    # to the email address from which you send your outgoing emails to users,
    # "My Site Name <no-reply@my-site.com>" for example.
    MAIL_SERVER='localhost'
    MAIL_PORT=25
    MAIL_USE_TLS=False
    MAIL_USE_SSL=False
    MAIL_USERNAME=None
    MAIL_PASSWORD=None
    MAIL_DEFAULT_SENDER=None
    
    # Parameters for Google reCAPTCHA 2. You should obtain your own public/private
    # key pair from www.google.com/recaptcha, and put it here.
    RECAPTCHA_PUBLIC_KEY='6Lc902MUAAAAAJL22lcbpY3fvg3j4LSERDDQYe37'
    RECAPTCHA_PIVATE_KEY='6Lc902MUAAAAAN--r4vUr8Vr7MU1PF16D9k2Ds9Q'
    
    # Set this to the number of worker processes for handling requests -- a
    # positive integer generally in the 2-4 * $NUM_CORES range.
    GUNICORN_WORKERS=2
    
    # Set this to the number of worker threads for handling requests. (Runs
    # each worker with the specified number of threads.)
    GUNICORN_THREADS=1

    Visit original content creator repository
    https://github.com/epandurski/hydra_login2f

  • DeathmatchPlusPlus

    Kyokyo’s Deathmatch++

    very special thanks to duuqnd for starting this project

    ORIGINAL DM+ Steam Workshop Link

    tf is this

    The OG creator put the original DM+ on GitHub and wants someone to do something with it

    C H A L L E N G E  A C C E P T E D

    Basically, this is my edit of Deathmatch Plus to be… better. I’m gonna try to meet some of the goals that the OG author had and some of my own. It’ll be cool.

    Hopefully.

    Also note that a lot of this readme is copy-paste from the OG DM+ with some edits and additions. Sorry.

    How to install

    Steam Workshop Method:
    1. Go to the Steam Workshop page (not updated yet so don’t actually do that yet).
    2. Subscribe to the addon.
    3. Profit.

    If you want to put it on a dedicated server, look at this.

    From Source Method:
    1. Copy the ‘src’ folder to SteamApps/common/GarrysMod/garrysmod/addons and rename it to dmpp_beta.
    2. (Re)start Garry’s Mod.
    3. Select the DM++ gamemode.
    4. Congrats you dun did it

    Future Goals

    A “Last man standing” sub-gamemode. Essentially, instead of going for the most kills, you just want to be the last guy alive. It’ll be round based and have anti-camp measures. Maybe a Battle Royale-style bubble of P A I N or something else.

    A “Capture the flag” like sub-gamemode. nah fam, that’s stupid (although if you yell at me enough I might try it)

    More customization.

    More officially supported maps. (kyokyo’s note: have no idea what this means yet)

    Custom made weapons for the gamemode. My goal is to basically have this mode as a template for whatever you want to do, so I don’t want to make custom weapons. Again though, yell at me enough and I’ll throw my hat into the ring. I could try to make some unique weapons. Key word try.

    Remove dependency on FA:S. I don’t want anyone to have to download more than they nor the host wants to.

    Add a customizable shop system like some other deathmatch gamemodes.

    Have the ability to set up teams or squads.

    Console Commands

    dmp_allow_medkits (0|1)

    Toggles spawning with the medkit (default 0)

    0=Disabled | 1=Enabled

    Example: dmp_allow_medkits 1 will make players able to spawn with a medkit instead of their secondary weapon

    dmp_maxkills

    Sets the amount of kills that a player can get before they win(default=5)

    Example: dmp_maxkills 3 makes a player win when they reach 3 kills

    dmp_healthmultiplier

    Multiplies base health by specified value (default 1)

    Example: dmp_healthmultiplier 2 will multiply the players starting health by 2. In this example, the players health will be 200

    NOTE: Decimals do not work (kyokyo’s note: this will definitely be fixed later)

    dmp_armormultiplier

    Multiplies armor value by specified number (default 0)

    Example 1: dmp_armormultiplier 1 will set starting armor value to 10

    Example 2: dmp_armormultiplier 5 will multiply the default starting armor value by 5. In this example, the starting armor value will be 50

    NOTE: Decimals do not work (kyokyo’s note: this will definitely be fixed later)

    dmp_ammo

    Sets the starting reserve ammo for the player (default 50)

    Example 1: dmp_ammo 0 will set the players starting reserve ammo to none

    Example 2: dmp_ammo 100 will set the players starting reserve ammo to 100

    NOTE: dmp_ammo will set ALL of the weapons ammo to the specified amount (kyokyo’s note: maybe add convars for different categories of weapons? idk)

    dmp_meds

    Sets the starting amount of medical supplies in the medkit (default=5)

    Example 1: dmp_meds 1 will set the starting amout of medical supplies to 1 (NOTE: using dmp_meds 1 will set ALL medical supplies to be 1, aka, 1 bandade, 1 quikclot and 1 hemostat)

    Example 2: dmp_meds 10 will set the starting amout of medical supplies to 10 (NOTE: using dmp_meds 10 will set ALL medical supplies to be 10, aka, 10 bandades, 10 quikclots and 10 hemostats)

    NOTE: dmp_meds will have NO effect if “dmp_allow_medkits` is set to 0

    Visit original content creator repository https://github.com/kebokyo/DeathmatchPlusPlus
  • spacedrive

    Logo

    Spacedrive

    A file explorer from the future.
    spacedrive.com »
    Download for macOS (Apple Silicon | Intel) · Windows · Linux · iOS · Android
    ~ Links for iOS & Android will be added once a release is available. ~

    Spacedrive is an open source cross-platform file manager, powered by a virtual distributed filesystem (VDFS) written in Rust.

    Important

    We regret to inform our valued Spacedrive community that we must temporarily pause our development roadmap beyond our latest update. Due to current funding constraints and related challenges, we cannot deliver new features or updates for the foreseeable future.

    While this was a tough decision, our team remains committed to Spacedrive’s vision and will explore options to resume development when circumstances allow. We deeply appreciate your understanding and continued support during this challenging period.

    The Spacedrive Team

    Organize files across many devices in one place. From cloud services to offline hard drives, Spacedrive combines the storage capacity and processing power of your devices into one personal distributed cloud, that is both secure and intuitive to use.

    For independent creatives, hoarders and those that want to own their digital footprint, Spacedrive provides a free file management experience like no other.

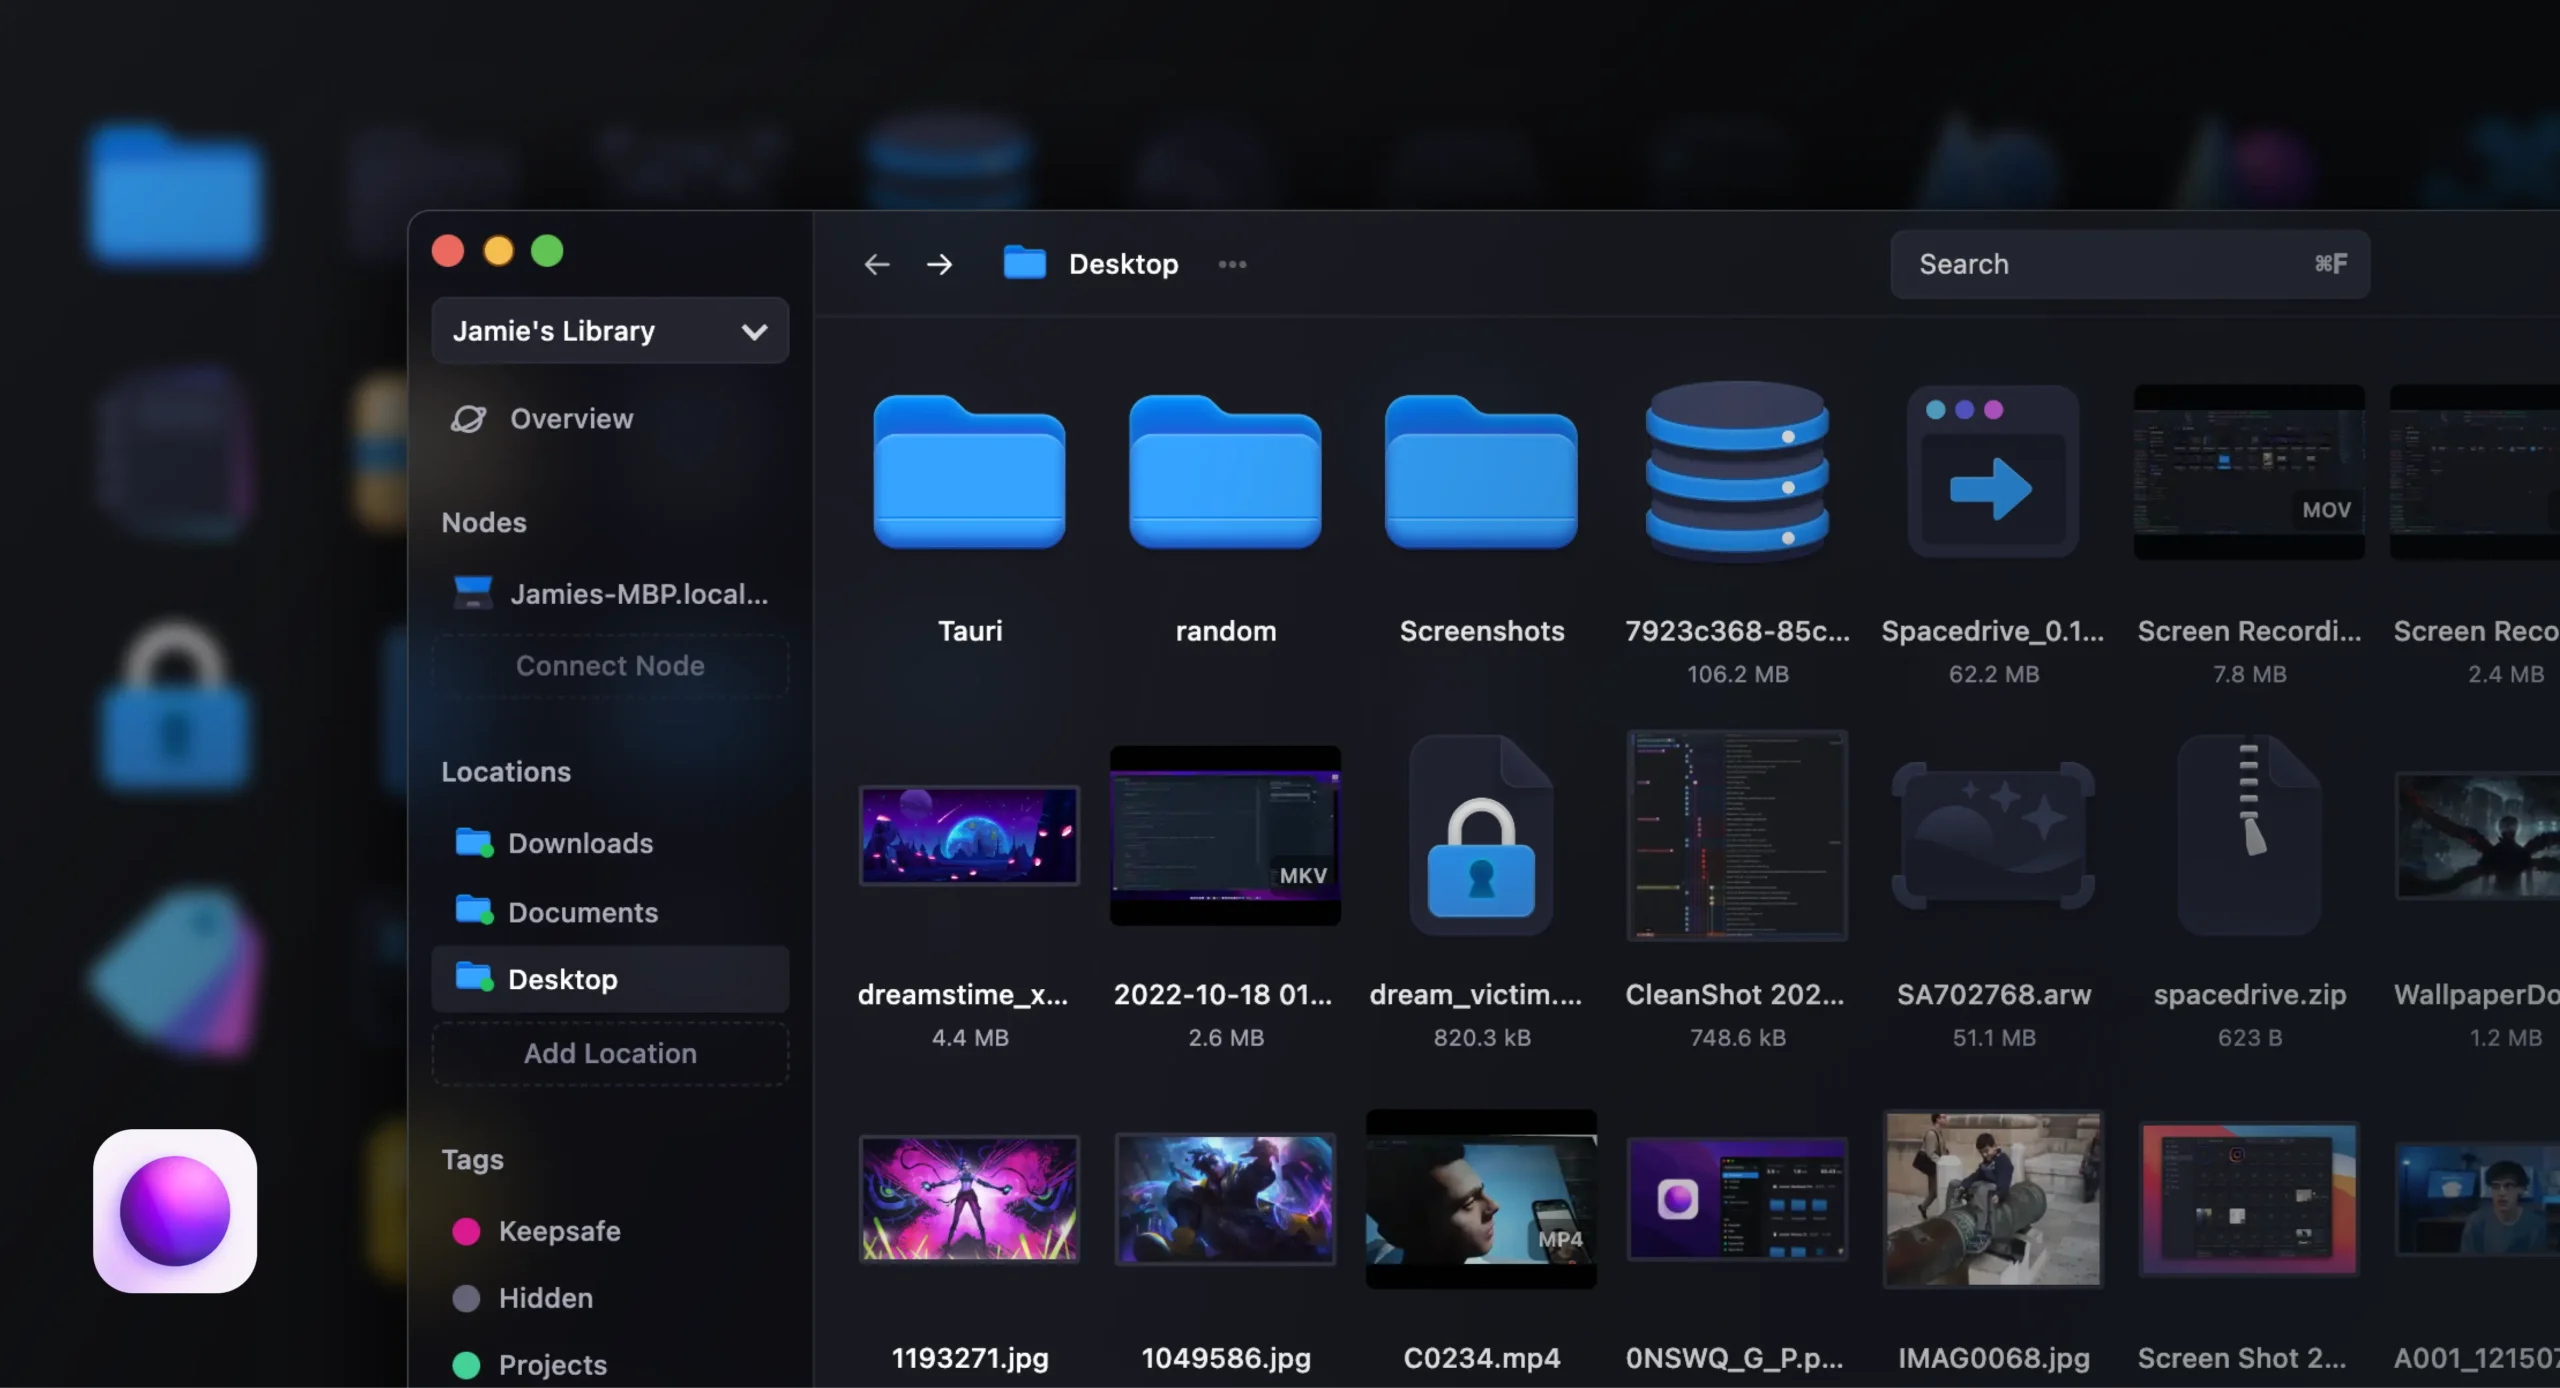
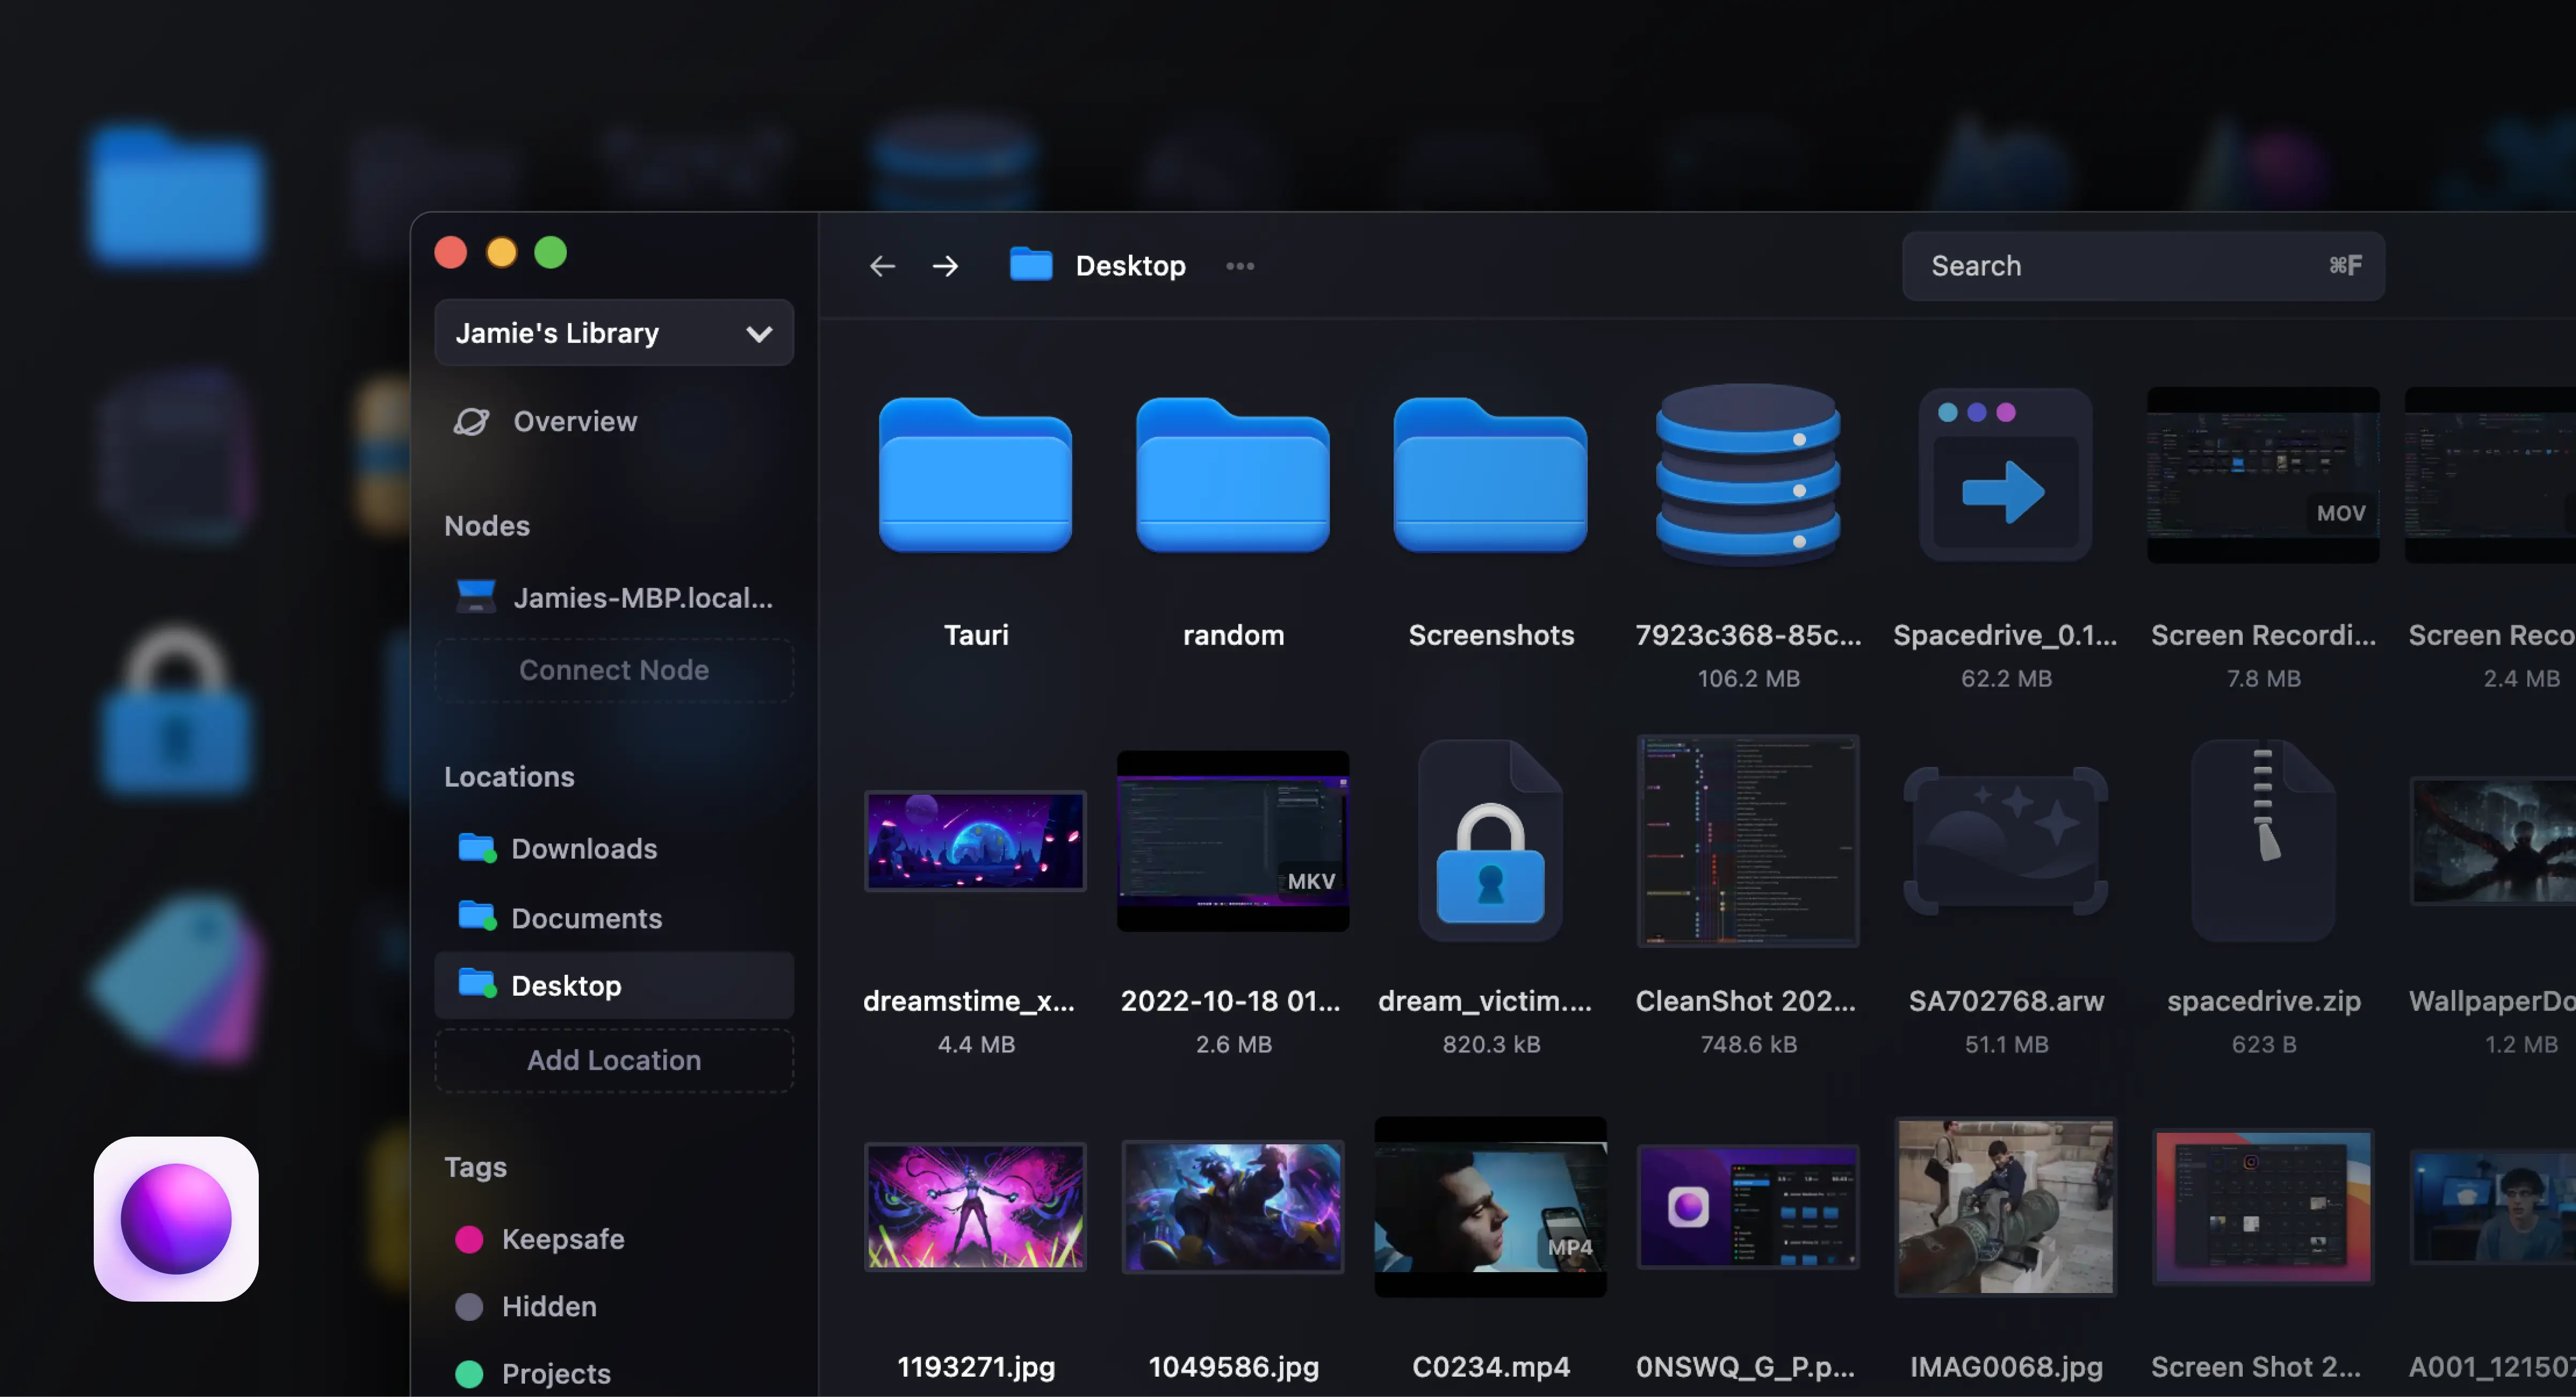
    App screenshot

    What is a VDFS?

    A VDFS (virtual distributed filesystem) is a filesystem designed to work across a variety of storage layers. With a uniform API to manipulate and access content across many devices, VDFS is not restricted to a single machine. It achieves this by maintaining a virtual index of all storage locations, synchronizing the database between clients in realtime. This implementation also uses CAS (Content-addressable storage) to uniquely identify files, while keeping record of logical file paths relative to the storage locations.

    The first implementation of a VDFS can be found in this UC Berkeley paper by Haoyuan Li. This paper describes its use for cloud computing, however the underlying concepts can be translated to open consumer software.

    Motivation

    Many of us have multiple cloud accounts, drives that aren’t backed up and data at risk of loss. We depend on cloud services like Google Photos and iCloud, but are locked in with limited capacity and almost zero interoperability between services and operating systems. Photo albums shouldn’t be stuck in a device ecosystem, or harvested for advertising data. They should be OS agnostic, permanent and personally owned. Data we create is our legacy, that will long outlive us—open source technology is the only way to ensure we retain absolute control over the data that defines our lives, at unlimited scale.

    Roadmap

    View a list of our planned features here: spacedrive.com/roadmap

    Developer Guide

    Please refer to the contributing guide for how to install Spacedrive from sources.

    Security Policy

    Please refer to the security policy for details and information on how to responsibly report a security vulnerability or issue.

    Architecture

    This project is using what I’m calling the “PRRTT” stack (Prisma, Rust, React, TypeScript, Tauri).

    • Prisma on the front-end? 🤯 Made possible thanks to prisma-client-rust, developed by Brendonovich. Gives us access to the powerful migration CLI in development, along with the Prisma syntax for our schema. The application bundles with the Prisma query engine and codegen for a beautiful Rust API. Our lightweight migration runner is custom built for a desktop app context.
    • Tauri allows us to create a pure Rust native OS webview, without the overhead of your average Electron app. This brings the bundle size and average memory usage down dramatically. It also contributes to a more native feel, especially on macOS due to Safari’s close integration with the OS.
    • We also use rspc, created by Oscar Beaumont, which allows us to define functions in Rust and call them on the TypeScript frontend in a completely typesafe manner.
    • The core (sdcore) is written in pure Rust.

    Monorepo structure:

    Apps:

    • desktop: A Tauri app.
    • mobile: A React Native app.
    • web: A React webapp.
    • landing: A React app using Next.js.
    • server: A Rust server for the webapp.
    • cli: A Rust command line interface. (planned)
    • storybook: A React storybook for the UI components.

    Core:

    • core: The Rust core, referred to internally as sdcore. Contains filesystem, database and networking logic. Can be deployed in a variety of host applications.
    • crates: Shared Rust libraries used by the core and other Rust applications.

    Interface:

    • interface: The complete user interface in React (used by apps desktop, web)

    Packages:

    • assets: Shared assets (images, fonts, etc).

    • client: A TypeScript client library to handle dataflow via RPC between UI and the Rust core.

    • config: eslint configurations (includes eslint-config-next, eslint-config-prettier and all tsconfig.json configs used throughout the monorepo).

    • ui: A React Shared component library.

    • macos: A Swift Native binary for MacOS system extensions (planned).

    • ios: A Swift Native binary (planned).

    • windows: A C# Native binary (planned).

    • android: A Kotlin Native binary (planned).

    Visit original content creator repository https://github.com/spacedriveapp/spacedrive
  • deploy-tool

    说明

    部署应用工具,部署Web项目到服务器

    功能特性

    • ✔︎ 支持本地或远程项目,远程项目需设置仓库地址
    • ✔︎ 支持前端或Node项目,Node项目部署后运行
    • ✔︎ 支持上传静态资源到OSS服务器
    • ✔︎ 支持设置默认的配置,一次配置多次使用,配置可扩展

    English Document

    安装

    npm i @ifun/deploy -g

    @2.x

    • 重构了大部分代码,模块之间的功能划分更加明确,减少耦合,
      • bin作为工具的命令行入口,只负责识别命令、整合参数给具体的执行者
      • lib聚焦于单一功能点,完成具体的功能
      • config存储配置
      • sh放置执行脚本
    • 变更配置的使用方式,工具不再维护具体项目的配置,由具体项目自己维护
    • 通过命令行只能配置全局参数,不再提供通过命令行配置项目的参数

    使用

    部署项目

    通过在项目根目录下新建一个名为deploy.config.js的文件,导出项目自己的配置:

    // deploy.config.js
    module.exports = {
      // key即为部署方案名,一个项目可以有多个部署方案,比如部署在多个服务器,或者多个部署模式
      dev: {
        web: '192.168.90.78',
      },
      prod: {
        web: '118.25.16.129',
      }
    }

    使用时,在项目根目录下运行:

    deploy app <scheme>
    
    # 示例
    deploy app dev

    获取和设置全局参数

    # 获取全局配置项web
    deploy config get web
    
    # 设置全局配置项web为88.88.88.88
    deploy config set web 88.88.88.88
    

    单纯上传到oss

    支持从本地或仓库上传静态资源到OSS,如果是本地项目,则直接上传到oss服务器指定目录。如果是远程仓库,会先git clone到本地,如果需要打包,则执行传入的打包命令,然后再上传。

    # e.g.
    deploy oss <scheme> -i <accessKeyId> -s <accessKeySecret>

    帮助

    # for help
    deploy -h
    
    # for more detail
    deploy <command> -h
    
    # e.g
    deploy app -h
    

    参数说明

    默认的全局配置:

    {
      "web": "118.25.16.129", // 服务器ip地址
      "dir": "/var/proj/", // 服务器部署目录
      "user": "root", // 用于ssh登录的用户名
      "type": "0", // 项目类型,0-static,1-node
      "isNeedBuild": true, // 是否执行打包构建
      "buildScript": "build", // 构建命令
      "distDir": "dist", // 构建后静态资源目录
      "npmRegistry": "http://registry.npmjs.org/" // npm镜像源
    }

    可通过命令行传入的参数:

      .command('app <name>')
      .option('-w, --web [web]', 'web服务器')
      .option('-u, --user [user]', 'web服务器用户名')
      .option('-d, --dir [dir]', '要部署到web服务器的目录')
    
    .command('config <action>')
      .option('-a, --all', '是否读取全部配置')
    
     .command('oss <name>')
      .option('-i, --accessKeyId <accessKeyId>', 'oss accessKeyId')
      .option('-s, --accessKeySecret <accessKeySecret>', 'oss accessKeySecret')
      .option('-p [publicDir]', '项目内要部署到OSS的文件目录')
      .option('-b [bucket]', 'oss bucket')
      .option('-r [region]', 'oss region')
      .option('-a [assets]', 'oss 静态资源目录')

    自定义默认配置

    通过命令行可以设置全局配置

    deploy config set [key] [value]
    # e.g.
    deploy config set user yourname

    项目内的配置文件

    在项目的根目录下,通过deploy.config.js文件,维护项目自己的配置:

    // deploy.config.js
    module.exports = {
      // key即为部署方案名,一个项目可以有多个部署方案,比如部署在多个服务器,或者多个部署模式
      dev: {
        web: '192.168.90.78',
        newkey: 'new value',
      },
      prod: {
        web: '118.25.16.129',
      }
    }

    临时修改

    临时输入的参数具有最高权级,会覆盖全局和项目的默认配置,仅生效一次

    # 通过命令行传递的`web`的参数最终会被使用
    deploy app [scheme] -w 88.88.88.88 

    约定

    以下约定是本项目的默认设置

    前端

    • 项目生产环境打包命令 build
    • 打包后的文件夹名 dist

    服务端

    • 服务启动命令 npm run prod
    • 服务停止命令 npm run stop

    实践

    以下项目均通过本工具实现部署,线上预览地址在项目的github page:

    Visit original content creator repository
    https://github.com/weihomechen/deploy-tool

  • sfzlint

    Linter and parser for .sfz files

    CLI programs are mostly done.

    Includes the sfzlint and sfzlist command line utilities
    sfzlint will parse and validate sfzfiles. If a directory is passed it will be recursivly searched for sfz files.

    $ sfzlint path/to/file.sfz
    path/to/file.sfz:60:11:W continuous not one of ['no_loop', 'one_shot', 'loop_continuous', 'loop_sustain'] (loop_mode)
    path/to/file.sfz:98:18:W 8400 not in range -1 to 1 (fileg_depthccN)
    path/to/file.sfz:107:12:E expected integer got 0.1 (lfoN_freq)
    path/to/file.sfz:240:1:W unknown opcode (ampeg_sustain_curveccN)
    

    sfzlist will print a list of known opcodes and metadata to stdout. Callig with --path will cause it to print opcodes found in that path

    $ sfzlist --path /sfz/instra/Scarypiano/
    amplitude_onccN aria Range(0,100) modulates=amplitude
    lokey v1 Range(0,127)
    ampeg_release_onccN v2 Alias(ampeg_releaseccN)
    label_ccN aria Any()
    bend_up v1 Range(-9600,9600)
    

    Opcode data is from sfzformat.com. If you see a bug in syntax.yml consider putting you PR
    against the source

    Features

    • syntax validation
    • checks opcodes against known opcodes on sfzformat.com
    • validates opcode values when min or max or type are defined in the spec
    • validates *_curvecc values above 7 have a corresponding <curve> header
    • checks that sample files exists, also checks that case matches for portability with case-sensitive filesystems
    • pulls in #includes and replaces vars from #defines
    • validation based on aria .xml files

    HowTo

    If you have a project that is seperated into several .sfz files using #include macros
    Example:

    instra.sfz
    samples/
       a#1.wav
       b1.wav
       ...
    includes/
       piano.sfz
       forte.sfz
       ...
    

    To validate the whole project you can use sfzlint --check-includes instra.sfz.
    Running sfzlint against a program .xml file will check includes by default.
    If you run sfzlint includes/piano.sfz and piano.sfz has some sample opcodes you may get file not found errors.
    To fix this run with --rel-path

    sfzlint includes/piano.sfz --rel-path .

    Installing

    I’ve not put this on pypi yet. You can install with pip

    pip install pyyaml
    pip install git+https://github.com/jisaacstone/sfzlint.git
    

    Or clone the repo and use python setup.py install

    Both methods require python version >= 3.6

    To use with vim/neomake:

    (This is what I built this thing for)

    put the following in your .vimrc:

    au BufNewFile,BufRead *.sfz set filetype=sfz
    let g:neomake_sfz_enabled_makers=['sfzlint']
    let g:neomake_sfzlint_maker = {'exe': 'sfzlint', 'errorformat': '%f:%l:%c:%t %m'}
    

    Visit original content creator repository
    https://github.com/jisaacstone/sfzlint

  • numbaclass

    Numbaclass

    Add @numbaclass decorator to Python class, to compile it with Numba experimental StructRef.

    • Converted class will work inside other jitted or non-jitted functions in pure Python.
    • Classed can be nested.
    • Supports Numba cache

    import numpy as np
    from numbaclass import numbaclass
    
    @numbaclass(cache=True)
    class ExampleIncr:
        def __init__(self, arr_, incr_val):
            self.arr_ = arr_
            self.incr_val = incr_val
    
        def incr(self, i):
            self.arr_[i] += self.incr_val
    
        def get_count(self, i):
            return self.arr_[i]

    Because @numbaclass relies on Numba StructRef, the above example, under the hood, converts to this:

    Click to expand
     

    import numpy as np
    
    from numba import njit
    from numba.core import types
    from numba.experimental import structref
    from numba.core.extending import overload_method, register_jitable
    
    
    class ExampleIncr(structref.StructRefProxy):
        def __new__(
            cls,
            arr_,
            incr_val
        ):
            return structref.StructRefProxy.__new__(
                cls,
                arr_,
                incr_val
            )
    
        @property
        def arr_(self):
            return get__arr_(self)
    
        @property
        def incr_val(self):
            return get__incr_val(self)
    
        def get_count(self, i):
            return invoke__get_count(self, i)
    
        def incr(self, i):
            return invoke__incr(self, i)
    
    @njit(cache=True)
    def get__arr_(self):
        return self.arr_
    
    @njit(cache=True)
    def get__incr_val(self):
        return self.incr_val
    
    @register_jitable
    def the__get_count(self, i):
        return self.arr_[i]
    
    
    @njit(cache=True)
    def invoke__get_count(self, i):
        return the__get_count(self, i)
    
    @register_jitable
    def the__incr(self, i):
        self.arr_[i] += self.incr_val
    
    
    @njit(cache=True)
    def invoke__incr(self, i):
        return the__incr(self, i)
    
    
    @structref.register
    class ExampleIncrType(types.StructRef):
        def preprocess_fields(self, fields):
            return tuple((name, types.unliteral(typ)) for name, typ in fields)
    
    structref.define_proxy(
        ExampleIncr,
        ExampleIncrType,
        [
     "arr_",
     "incr_val"
        ],
    )
    
    @overload_method(ExampleIncrType, "get_count", fastmath=False)
    def ol__get_count(self, i):
        return the__get_count
    
    @overload_method(ExampleIncrType, "incr", fastmath=False)
    def ol__incr(self, i):
        return the__incr

    Every method gets wrapped with @njit (same as @jit(nopython=True))

    By default, cache flag is False. @numbaclass(cache=False) will not store files and caches.
    Set @numbaclass(cache=True) to save generated code and numba compiled cache to
    __nbcache__ folder, neighbouring __pycache__.

    Installation

    git clone git@github.com:anvlobachev/numbaclass.git
    cd numbaclass
    python -m pip install .
    

    Configure

    Disable conversion globally via environment variable:
    “NUMBACLS_BYPASS” = “1”

    Use Guides and Tips

    • Decorator expects one Python class within module.

    • “self.” attributes within __init__ must be assigned with Numba compatible data types or objects.

    • Scalar variable will be treated as constant by StructRef. To be able to update the value, it’s advisable to use array of one item size. Probably overcome this.

    @numbaclass is usefull for arranging code for compute intensive, repetative operations with a state.

    Decorated class stays clean from additional code, which is needed using StructRef directily.
    In case of Numba’s own @jitclass decorator, caching and nesting is not supported.
    While @numbaclass utilizes StructRef to cache compiled code and allows to constuct nested classes.

    Todos

    • Add setters
    • Move from Alfa to Beta release
    • Check changes of source vs cached before generate.
    • Implement literal_unroll mock.
    • Implement with object() mock to call pure Python from jitted code.

    Visit original content creator repository
    https://github.com/anvlobachev/numbaclass

  • JetPack_Enhanced_Face_Recognition

    JetPack_Enhanced_Face_Recognition

    What is this project

    I wrote this project to practice the Jetpack MVVM & share my experiences
    implementation of face recognition powered by some FaceEngine SDK.
    During my last job, I implemented 4 FaceEngines provided by 4 different
    companies. They are mostly similar to each other, only one of them needs
    to implement their build-in face lib.

    I chose the ArcSoft FaceEngine SDK for this project because of they APIs
    and document are better in my opinion.

    Why would I start this

    As I said, this is a demo project. I share my understanding of the face
    recognition process with you through this project, and I hope you can
    offer me some advices in the Issue. Another key point is the Jetpack,
    I’m of it and I believe it’s the best way to build a modern App so far.

    How to run

    Register a developer account to get your AppID & SdkKey and input them
    into
    gradle.properties
    file, then just hit it!

    Thanks to

    @Androidx

    @Jetpack MVVM

    @KunMinX

    @ArcSoft

    Licence

    Copyright 2018-2020 NARUTONBM
    
    Licensed under the Apache License, Version 2.0 (the "License");
    you may not use this file except in compliance with the License.
    You may obtain a copy of the License at
    
       http://www.apache.org/licenses/LICENSE-2.0
    
    Unless required by applicable law or agreed to in writing, software
    distributed under the License is distributed on an "AS IS" BASIS,
    WITHOUT WARRANTIES OR CONDITIONS OF ANY KIND, either express or implied.
    See the License for the specific language governing permissions and
    limitations under the License.
    

    Visit original content creator repository
    https://github.com/RandallXia/JetPack_Enhanced_Face_Recognition

  • react-star

    react-star

    ⭐️ Please support us by giving a star! Thanks! ⭐️

    react-star

    A tiny star rating component with custom icons for React.

    🎁 Features

    • Easy to use
    • Compatible with both JavaScript and TypeScript

    🔧 Install

    react-star is available on npm. It can be installed with the following command:

    npm install react-star --save
    

    react-star is available on yarn as well. It can be installed with the following command:

    yarn add react-star
    

    💡 Usage

    import React from 'react';
    import { Star } from 'react-star';
    
    class App extends React.Component {
      render() {
        return (
          <Star
            onChange={(value) => console.log(value)}
          />
        );
      }
    };
    
    export default App;

    📖 APIs

    Props Type Default Description
    defaultValue number 0 The default value. Use when the component is not controlled.
    shape ‘thin’ | ‘fat’ ‘thin’ The shape of the star.
    fraction number 1 The number of equal subdivisions that can be selected as a rating in each icon, example, for a fractions value of 2, you will be able to select a rating with a precision of down to half a icon.
    readOnly boolean false Removes all hover effects and pointer events.
    min number 0 Minimum star.
    max number 5 Maximum star.

    🔰 Callbacks

    Callback Type Description
    onChange (value) => {} The onChange props fires the moment when the value of the element is changed.
    onClick (value) => {} The onclick props fires on a mouse click on the element.
    onHover (value) => {} The onHover event occurs when the mouse pointer is moved onto an element.

    ❗ Issues

    If you think any of the react-star can be improved, please do open a PR with any updates and submit any issues. Also, I will continue to improve this, so you might want to watch/star this repository to revisit.

    🌟 Contribution

    We’d love to have your helping hand on contributions to react-star by forking and sending a pull request!

    Your contributions are heartily ♡ welcome, recognized and appreciated. (✿◠‿◠)

    How to contribute:

    • Open pull request with improvements
    • Discuss ideas in issues
    • Spread the word
    • Reach out with any feedback

    ✨ Contributors

    Bunlong
    Bunlong

    ⚖️ License

    The MIT License License: MIT

    Visit original content creator repository https://github.com/Bunlong/react-star
  • Revolut-to-YNAB

    Revolut to YNAB automation bridge

    This is a minimalistic implementation of a process that bulks the transactions of a given Revolut account to You Need A Budget; all through APIs. The current implementation handles duplication through the YNAB internal functionality. It’s way of working consists of calling the main module with an argument specifying an account name (previously configured). After that call, the system will retrieved all the Revolut transactions, and it will push them to the YNAB budget and account specified in the configuration files.

    Please keep in mind that this is a personal project meant to satisfy a personal necessity. It may not totally apply to your use-case. Feel free to fork the project or suggest any extra functionality.

    Due to the limitation of YNAB of only being able to track single-currency accounts, different currencies must be pushed to different budgets.

    Getting started

    Follow the next steps to have the project running in your system:

    1. Install pyenv and poetry in your system following the linked official guides.
    2. Open a terminal, clone this repository and cd to the cloned folder.
    3. Run pyenv install 3.6.1 in your terminal for installing the required python. version
    4. Configure poetry with poetry config virtualenvs.in-project true
    5. Create the virtual environment with poetry install
    6. Create the config/ynab.toml file following the example in the same folder.
    7. Create the config/revolut.toml file following the example in the same folder. Make sure you establish the links from each account configured here to the desired YNAB account name. To get the token and device-id, please follow the steps of the revolut python package (you will have to run revolut_cli.py in your shell, without the python keyword, and follow the steps).
    8. Activate the environment with source .venv/bin/activate
    9. Run python main.py -a <revolut-account-name> to send the transactions from the Revolut account specified to the YNAB account

    Contribution

    Pull requests and issues will be tackled upon availability.

    License

    This repository is licensed under MIT license. More info in the LICENSE file. Copyright (c) 2020 Iván Vallés Pérez

    Visit original content creator repository https://github.com/ivallesp/Revolut-to-YNAB